Setup AWS with PyTorch/Tensorflow, Jupyter, and OpenAI gym
Amazon Web Services (AWS) is a subsidiary of Amazon that provides on-demand cloud computing platforms to individuals, companies and governments, on a paid subscription basis. The technology allows subscribers to have at their disposal a virtual cluster of computers, available all the time, through the Internet. For those who are just getting started with machine learning, deep learning (computer vision, natural language processing, deep reinforcement learning), AWS is really a good platform to work with. For the virtual machine with GPUs, it can speed up the learning time for neural networks. One of our scholars, Yuhao introduced how to setup AWS step by step. In this post, I will focus on setting up Jupyter Notebook and implement some sample codes with OpenAI gym.
Jupyter Notebook and Monitor Notebook on Local Computer
Once you successfully set up your AWS,
pip install jupyter
jupyter notebook --generate-config
jupyter notebook --no-browser --port=8889
Then on your local computer, open a new terminal, type in the following command to monitor the jupyter notebook on AWS from local:
ssh -i key.pem -NfL 8889:localhost:8889 remote_user@remote_host
OpenAI gym
Gym is a toolkit for developing and comparing reinforcement learning algorithms. It makes no assumptions about the structure of your agent, and is compatible with any numerical computation library, such as TensorFlow or PyTorch.
First, we have to install OpenAI gym for reinforcement learning.
# if you are using python 2.7:
$ pip install gym

# if you are using python 3.5:
$ pip3 install gym
Congratulations! Now you are able to run basic gym examples: - algorithmic - toy_text - classic_control
You might have to install the following packages if you receive error in previous steps:
# MacOS:
$ brew install cmake boost boost-python sdl2 swig wget

# Ubuntu 14.04:
$ apt-get install -y python-numpy python-dev cmake zlib1g-dev libjpeg-dev xvfb libav-tools xorg-dev python-opengl libboost-all-dev libsdl2-dev swig
Now let’s see some examples from OpenAI gym:
import matplotlib.pyplot as plt
%matplotlib inline
from IPython import display
import gym
from IPython import display
import matplotlib
import matplotlib.pyplot as plt
%matplotlib inline
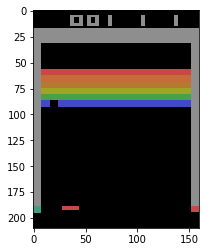
env = gym.make('Breakout-v0')
env.reset()
img = plt.imshow(env.render(mode='rgb_array')) # only call this once
for _ in range(500):
img.set_data(env.render(mode='rgb_array')) # just update the data
display.display(plt.gcf())
display.clear_output(wait=True)
action = env.action_space.sample()
env.step(action)
import gym
import math
import numpy as np
import tempfile
from gym import wrappers
from IPython import display
import matplotlib
import matplotlib.pyplot as plt
%matplotlib inline
tdir = tempfile.mkdtemp()

env = gym.make('FrozenLake-v0')
env.seed(0)
np.random.seed(56776)
q_learning_table = np.zeros([env.observation_space.n,env.action_space.n])

# -- hyper --
num_epis = 500
num_iter = 200
learning_rate = 0.2
discount = 0.9

# -- training the agent ----
for epis in range(num_epis):

    state = env.reset()

    for iter in range(num_iter):
        action = np.argmax(q_learning_table[state,:] + np.random.randn(1,4))
        state_new,reward,done,_ = env.step(action)
        q_learning_table[state,action] = (1-learning_rate)* q_learning_table[state,action] + \
                                         learning_rate * (reward + discount*np.max(q_learning_table[state_new,:]) )
        state = state_new

        if done: break

print(np.argmax(q_learning_table,axis=1))
print(np.around(q_learning_table,5))
print('-------------------------------')
s = env.reset()
for _ in range(500):
    action  = np.argmax(q_learning_table[s,:])
    state_new,_,done,_ = env.step(action)
    env.render()
    s = state_new
    if done: break